NodeJS works as a node package manager behind the scene. It is recommended to download and install the latest version of Node.js.
PostgreSQL, also known as Postgres, is a free and open-source relational database management system emphasizing extensibility and SQL compliance. It was originally named POSTGRES, referring to its origins as a successor to the Ingres database developed at the University of California, Berkeley.
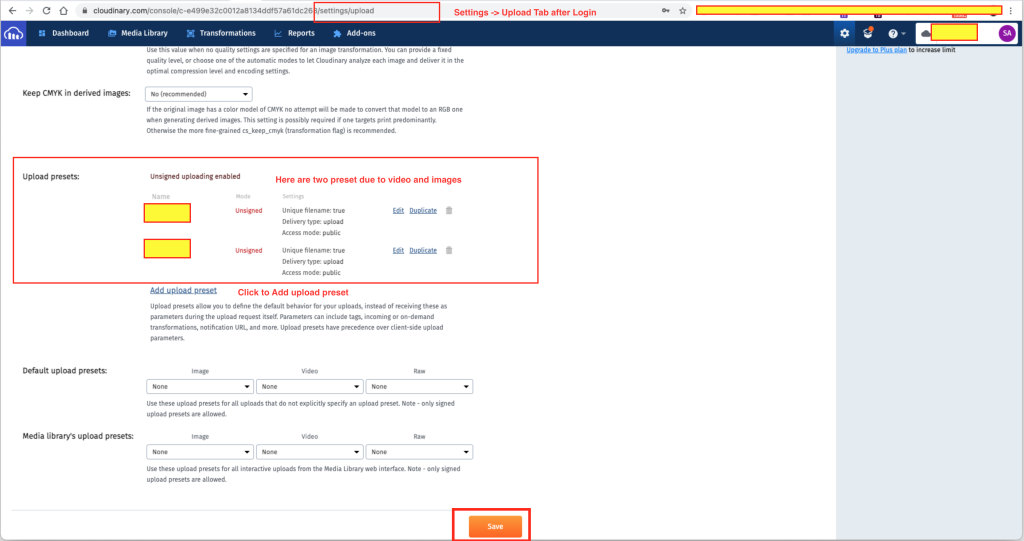

From the Above second image copy that API URL and paste it to any safe place and update it like below and it will be two

Now open the next.config.js from the root project of the downloaded bundle of ThemeForest.
edemy-web & follow the below.And Update the below environment variables values
CLOUDINARY_URL: "https://api.cloudinary.com......",
CLOUDINARY_VIDEO_URL: "https://api.cloudinary.com......",
STRIPE_SECRET_KEY: "sk_test_3D..........",
STRIPE_PUBLISHABLE_KEY: "pk_test_Zy........"upload_preset & cloud_name into the /pages/teacher/course/create.js file also for video upload /pages/teacher/course/upload-course-video.js file./project/config/config.json file with the necessary info{
"development": {
"username": "user",
"password": 'password || null",
"database": "edemy_database_development",
"host": "127.0.0.1",
"dialect": "postgres"
},
"test": {
"username": "user",
"password": "password",
"database": "edemy_database_test",
"host": "127.0.0.1",
"dialect": "postgres"
},
"production": {
"username": "user",
"password": "password",
"database": "edemy_database_production",
"host": "127.0.0.1",
"dialect": "postgres"
}
}
Open a terminal into this updated project which you have added several keys pieces of stuff and follow these steps
npm install --legacy-peer-deps npx sequelize-cli db:createnpx sequelize-cli db:migratenpm run devHow to create Admin
Users table into the database and find the role column update the value with admin