How to create and edit quizzes and questions with LearnPress?
A quiz is a collection of lessons. Creating a Quiz is quite similar to Lesson. You can create a new quiz by:
Go to LearnPress > Quizzes where all quizzes in the system is managed
Or go to one Course and create a quiz in the curriculum.
The Quiz icon is quite distinguishable with the lesson icon.
Upon editing a quiz, there are some new settings because you will need to create questions and setup lessons inside a quiz.
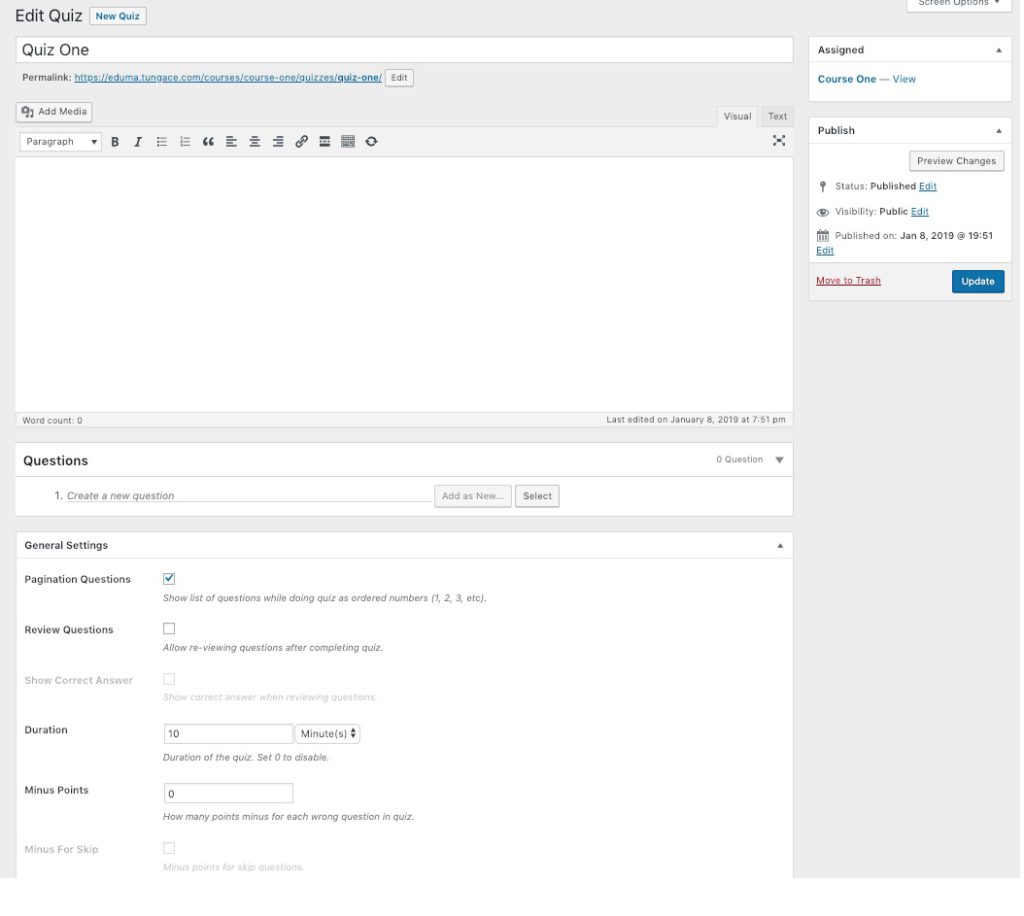
Here is how a Quiz Editor Page looks like:
In the Course Editor Page, there are some settings:
Quiz Title: Title of the quiz
Quiz Description: Description of the quiz
Questions: Where you can create new questions, or select questions created by using the button Select. You can start typing the question name and press Enter and it will open the Question Setting for you.
Quiz setting: Setup some basic information for the quiz like Duration, minus point of an incorrect answer, passing grade (condition for passing), whether to allow showing the answer or hint while doing quiz, etc.
Adding Questions
As I mentioned previously, you can type the name of the first question in the question box and press Enter and it will open the Question Setting for you.
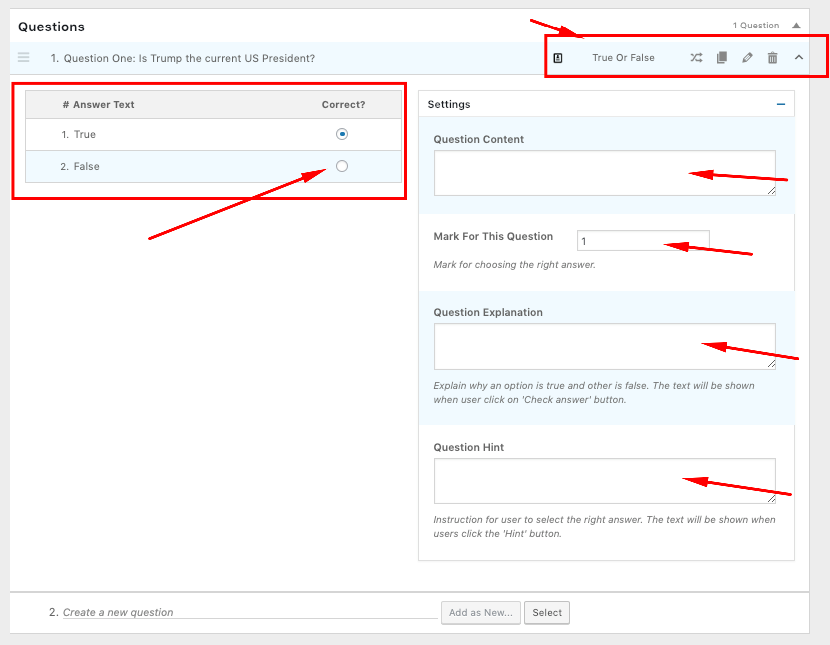
For example, in this screenshot, I created a question and here is what the question setting looks like.
The default type for the question is True/False. You can switch to other question type if you want. The default available Quiz type for LearnPress quizzes are: True or False, Multiple Choice, Single Choice.
You could also duplicate the question, or remove it from the quiz (unassign the question) or remove it from the system permanently.
Down below, you can: Add more answer option, change text of the answer, choose the correct answer.
On the right side, there are more settings of the question that allows you to:
Use the Question Content to add more content to the question to provide more detail to it. The editor here is quite simple. If you click on Edit Question icon on the top right of the question setting, you will be redirected to the Single Question Editor Page where you can use more Rich text formating or different editors.
Mark for this question: Add mark for the question. If the student get it right, they will earn that mark.
Question Explanation: Sometimes, you may want to give explanation to your question after your student have taken it.
Question Hint: Sometimes, you may want to give your student some hints on what to do to find the solution.